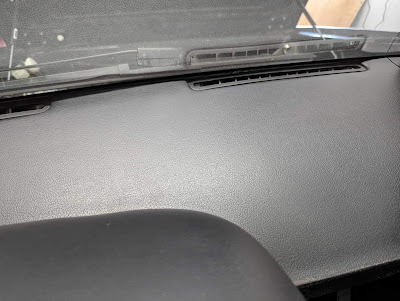
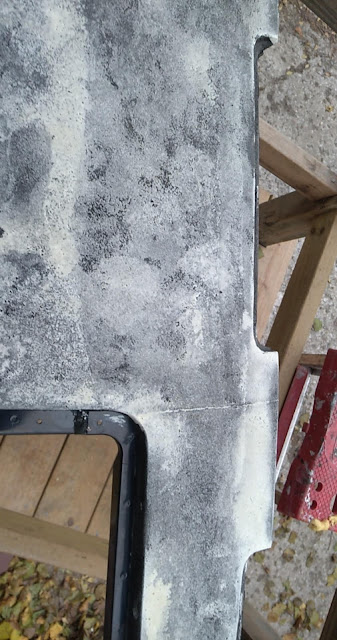
A while back, I had to kneel on the driver's seat to access something in the car when I felt the seat "give" a little. I believe that's the moment that the rubber mat under the seat tore, which made it feel like the seat bottom didn't have much padding and made the seat quite uncomfortable. Here's what that looks like:
I attempted a repair myself by finding some nylon material at JOANN Crafts, and put that in place to better support my backside. So I took out the broken rubber material:
The material needed to be strong enough to support my body weight, but hopefully also have a little give to it like the original rubber. The material I found was the kind of webbed material that you might find on patio furniture, which meant that it would be durable and strong, but it had zero give. This was the final result:
It was better than the broken rubber mat, but it just didn't feel as good as before. I ran it this way for a couple of years, but when I underwent an overhaul of the car's interior, I thought I'd attempt a better repair by having a local upholstery shop see what they could do.
They were unable to find a similar material to the rubber that was original, so we settled for another material that seemed to have a little bit of give to it. I haven't gotten the interior back together to see how it feels, but I'm hopeful that it will be a better solution to my temporary fix. It sure looks a lot prettier, even though I'm the only person that will ever see this side of the seat:
My DeLorean's A/C hasn't worked since I bought it. All of the original R12 had leaked out by the time I came to own it in 2011. A couple of years after I bought it, I flushed out the original system w/ mineral spirits and converted the fittings over to R134a. I had working A/C for a very short driving season that year before all of the refrigerant leaked out. I added some leak dye on the next refrigerant fill up, but even then, I couldn't ever find the source of the leak. I also suspected a problem with the original compressor at the time and replaced it with a new unit.
I concluded that the original A/C hoses were likely allowing the refrigerant to seep out, or I had a potential problem with the evaporator in the A/C housing. I knew that at some point, I would need to overhaul my entire system if I wanted reliable A/C.
Earlier this year, I dove into a project on the interior of my DeLorean that involved removing much of the interior, including the dashboard, and I thought that if I was going into it this deeply, now would be the best time to remove the A/C unit housing and include that as part of the interior overhaul. While doing that, I should replace the A/C lines with a modern replacement, the cooling fans, the evaporator, condenser, and everything else on the system, minus the new A/C compressor.
My engine cooling system was in great shape with the exception of the radiator of unknown age. I had replaced all of the cooling hoses and pipes a few years ago, including a new water pump, and the radiator was the only unsure thing remaining. I didn't know if it was the original radiator or if it had been replaced by a previous owner at some point. I decided that I didn't want to dive into the front end again like this for a radiator replacement, so I thought it best to replace it as well.
I already wrote extensively about the A/C unit housing restoration, which you can find here. The rest of the A/C overhaul was pretty straightforward. The condenser came out with the radiator. Here are some photos of that during the process:
The hose connections on the condenser came off much easier when it was lowered and more accessible with a large wrench. There was quite a bit of nasty brown fluid that came out of the hoses and the condenser once I had them disconnected.
While I was in there, I chose to replace my original cooling fans with modern replacements. Might as well, right? A little before and after action:
These fans mounted right into the original mounting holes on the fan shroud, which in turn mounted right up to the new radiator.
Getting the accumlator/dryer out was definitely the hardest part of the whole job. As anyone that has looked at the A/C dryer, there is little room to work. I couldn't get the connection loose coming from the evaporator to the dryer and didn't want to hack up the fiberglass underbody in order to create more space, so I whipped out the Sawzall and cut off the connection on the dryer in order to free it up. Even with the dryer out of the way, that connection took a lot of force to finally come free.
I then moved to the A/C lines and chose to route the new lines the same way the original lines were ran. I cut off the hoses near the compressor, taped the end of the old line to the new line, then fished the old lines out while the new lines but pulled into place.
The new lines were from DeLorean Industries and don't come with any connections pre-installed, which makes it easier to fish the new lines in between the underbody and frame. The kit uses a clamping system that I had to watch a video on YouTube in order to figure out, but seems really solid. I really like how the hoses are longer than needed and you trim them down to length, which provides extra flexibility for any changes in the routing.
I routed the line near the steering shaft further up to avoid any rubbing as the steering shaft rotates around. This route seemed like the best option to avoid future problems:
The only issue I encountered with all of the new parts was with the new condenser. One of the four nuts on the mounting bolts was stripped and wouldn't come off so I could connect it to the radiator. I contacted the vendor (DMCH) and they promptly sent me a new mount at no charge, which fixed the issue after I swapped the parts.
Winter is setting in now, so I won't have a chance to charge the all-new A/C system until next year. I'm sure there's a fitting or connection somewhere that I'll need to snug down, but everything is back together. I did get the car running so I could burp the new radiator and all of that is also back together and working great so far. The new fans also came on when the car got up to temp. They sound surprisingly quiet compared to the original fans. I also made sure that they were wired up correctly to pull air instead of pushing air back towards the radiator, which other owners have mistakenly done before. All checked out there and I fully expect to have many uneventful heating and cooling years ahead with this huge and pricey overhaul.
Speaking of price, here's a rough rundown of what some of the key items cost in 2024:
I replaced the radiator in my DeLorean as a "while I'm in there" thing, but noticed that the original fan shroud had a decent sized crack on the bottom where the A/C line runs into the bottom of the condenser:
Rather than replacing it with a reproduction, I decided to attempt a repair using a plastic welder, which was a new concept to me. Here's a link to the plastic welder that I purchased. When you insert a metal staple-looking thing in the rods, then pull the trigger, it quickly heats up the metal staple and it melts itself into the plastic. After it cools, the plastic hardens around the staple and it holds it firmly. It's really a great concept.
I added several of these plastic welding staples on the backside of the fan shroud, and after I installed the new radiator, I put in the repaired shroud. I am extremely pleased at how well it turned out:
I bought a pair of lower control arm support brackets from DeLorean Industries while I had my front suspension taken apart to fix some surface rust on the front frame extension while I was putting in a new radiator and condenser. These are supposed to firm up the steering, especially under intense conditions, such as hard braking.
It's a fairly straightforward job with the hardest part just figuring out which way the go on. I found a picture of them installed on someone else's car and I was able to figure it out. Each side comes labeled so you at least don't have to guess which one goes on which side. It comes with longer control arm bolts to be able to reach through the support brackets.
Basically, you just remove the control arm bolts and put these in their place. Here are some reference pictures of them installed on the driver's side, if they can be of help to anyone else trying to figure out how these are installed on the DeLorean:
Several years ago, in a project that started with a simple desire to change the old and failed motor mounts that evolved into pulling the motor and transmission, I also installed a modern fuel pump from DeLorean Industries so that I would have as reliable of a car as possible. During this process, I dropped the fuel tank for a deep cleaning, both inside and out, which I have written about before.
I have recently had my car off the road for a year while I tackled another project that snowballed, but this time it was for many things on the interior. I recently got it put back together enough to try and fire it up. It had been much too long since I had heard the motor come to life and I was excited to reach that milestone once again.
When I went to start it, it would fire immediately, but wouldn't stay running. It would cough, stumble, then die within a few seconds. I had a similar symptom as this a year and a half ago and felt like a fool when I discovered that it was just about empty on gas. I had to calibrate the fuel sender so it was more accurate, but that's a story for another time.
So I checked the fuel level, which was easy because I still had the fuel pump access panel off from when I had replaced the A/C lines, which I'll write about another time. I simply popped off the cap where the original fuel sender used to be and I could see that the tank had plenty of fuel with it being around half full.
It was acting like it would run when the cold start injector would kick on, but then not get any more fuel and die. To be sure it wasn't electrical, I verified the ballast resistor and coil were all wired correctly and that nothing was loose. Once that all checked out, I decided to dive further into the fuel. I decided I needed to verify that fuel was making it to the cylinders, so I pulled all six injectors and put them in glass mason jars.
On a Delorean, you can jumper the RPM relay so that the fuel pump runs nonstop, which is great for testing while the car is off. If you have the fuel pump running, you can then press down on the metering plate, and if everything is working, you should get fuel spraying from the injectors. I jumpered the RPM relay, but when I pressed down on the metering plate, I had zero fuel from all six injectors. I was stumped.
I removed one of the injectors and repeated the exercise just to see if fuel would come out without an injector in the way, and I did get fuel, so I knew the fuel pump was at least providing some pressure. Here's what that looked like:
I suspected that there may not be enough fuel pressure to open the injectors, but I didn't have a K-Jet fuel pressure gauge. I reached out to some local owners, and was lucky to have one volunteer to loan me their pressure gauge set. Once I got my hands on that, I saw that I only was seeing 40 PSI at the lines at the rear of the car.
In case anyone needs any reference photos, here's how I hooked up the pressure gauge near the motor:
In order for the injectors in a DeLorean to open, they need to get ~50 PSI, and since mine was only pushing 40 PSI, it made sense as to why I wasn't getting fuel out of my injectors. I needed to determine if the low pressure was being caused by something in between the pump and the lines, or if it was the fuel pump. There was another fuel pressure kit in the parts I borrowed that allowed me to hook a gauge up directly coming off the pump, so I disconnected the feed line, put on the pressure gauge, and was surprised to see ~40 PSI coming right off the pump.
Some other owners suggested that low pressure could be caused by a low battery, so I made sure the battery was charged, then checked the voltage at the connection. It registered right where I needed it to be, at around 12.7V, but I was still only getting 40 PSI from the pump when I jumpered the RPM relay.
I decided to bypass all of the wiring harness and see what happened if I hooked the fuel pump directly up to the battery instead of via the wiring harness. To my surprise, the pressure jumped up to ~60 PSI, which meant that something in the wiring was causing the low pressure.
After much head scratching, I couldn't figure out why I would have lower pressure from the fuel pump when the wiring harness was showing 12.7V, but with the same battery, pressure would jump up to normal if I hooked it directly to the battery. Someone suggested that I could be experiencing a drop in voltage once there was a load on the wires. I picked up a kit to backprobe the wires so I could watch the voltage when the fuel pump was hooked up to the wiring harness, and sure enough, as soon as power was sent to the fuel pump, the voltage dropped to only about 9 volts. The next question was why this was happening.
Some helpful DeLorean owners suggested that the wires were corroded, burned from heat, or there was a bad connection further up the harness, like where the wiring is connected near the windshield washer reservoir. The wiring harness looked good near the fuel pump. The wires were still very flexible and not at all crusty.
I saw no evidence of corrosion on the connector, so I decided to go upstream and check the connection near the washer fluid reservoir. I just wrote a blog post about the headache of getting the reservoir cover off as I had several bolts that spun the rivnuts.
I did eventually get that taken care of and found the wire on the connection that supplied power to the fuel pump. Here's the connector near the washer fluid reservoir:
I removed the fuel pump, put it in a bucket of gas, and hooked it up directly to the connection that supplied power, and to my surprise, I still saw a big drop in voltage and the fuel pressure was not as high as hooking it directly up to a battery. That meant that something further up the line was causing a voltage drop. You can see the voltage dropping in a video I took during all of my testing:
I then stumbled upon a write-up during all of my head scratching that the ground may need some attention. The ground for the fuel pump is tied to the inertia switch, which makes sense as the inertia switch would kill power to the fuel pump in the event of a collision. The inertia switch is located near the clutch pedal inside the car. Visually, mine looked fine, but I thought that I didn't have anything to lose.
The process of adding a more reliable ground involves cutting the ground wire coming off of the inertia switch, then running a new ground wire from both ends of the cut wire, under the carpet, and to one of the bolts that holds the tub to the frame. I followed the process that I found outlined here. I then tested the fuel pump pressure using the wiring harness and was so pleased to see it shoot up to nearly 70 PSI. The problem this entire time was a weak ground. I'm glad it wasn't a bad fuel pump or a cooked connection, but it was still frustrating that something I hadn't touched or messed with created this problem.
Next, I needed to confirm that the fixed fuel pressure would result in fuel coming out of the injectors, so back to the mason jars I went.
I was extremely happy when I pressed on the mixture plate and heard the whistling of fuel coming out of the injectors.
I was getting a pretty inconsistent spray pattern and volume from some of them, so I swapped some around to see if the problem followed the injectors. I decided that they could all use a good cleaning, so I took them all out. The injector seals were a pain to get off as the rubber was super hard and inflexible. I figured I might as well replace those while I had the injectors out. I found replacements from Advanced Auto for $2 a piece and they arrived within just a couple of days, which was awesome.
I put all of the injectors into a bucket of Berryman B-12 and was blown away with the amount of gunk that came off the injectors. They went in looking quite nasty and came out looking brand new after less than 30 minutes. But I knew that what I really needed to do was to force cleaner through the injector with pressure. I don't have a K-Jet injector cleaner and didn't want to wait around for one, so I created a redneck way to get cleaner through them by using an air compressor fitting, some foam to create a seal around the injector, and I was successful in getting a little bit of cleaner at a time through all of the injectors. I then connected the injectors back up to the fuel lines and tested the spray patterns and volume.
As you can see below, volume was a little bit of a hot mess. I swapped some injectors around and did several rounds of testing and saw a little improvement.
Ultimately, I took out a couple of injectors and put them through another round of cleaning. I had previously heard that a good rule of thumb is to get 5oz of gas out of each injector by pressing the mixture plate down for 30 seconds. I marked 5oz on the far-right bottle and tested to see where things ended up. It wasn't too far off of that number, so I called it good and installed the injectors back into the engine.
Here is one of the new injector seals before putting the injectors back in the engine. Check out how nice and clean the injector looks:
After putting in all the injectors, the moment of truth came when I went to start the car. It started and ran for the first time in a year after stumbling for a bit at first. I blew out all of the cobwebs and it ran beautifully. I got it up to temp while I got air out of the new radiator that I had installed during the year's nap and now I need to wrap up the rest of the interior before I can get it back on the road.
Here are some clips of the car running once again. I'm so pleased to have gotten past this no start headache.
I recently went through all of the extra DeLorean parts that I have accumulated over the years and put them into multiple categories: stuff I could dispose of, parts I should sell, and parts that I should put on my car.
One of the items that I put in the "put on my car" category was a new set of shift linkage bushings, including new pivot bolts. I had the transmission out of my car a few years ago and bought this set at the time, but only replaced the easily accessible linkages near the transmission. The others remained untouched.
I had much of the interior out of the car while doing other projects, and the car was already on jack stands, so I decided to give this a go.
I first discovered a very dirty and crusty looking trans bellcrank assembly near the fuel accumulator, so I removed it for sandblasting and paint.
I replaced the pivot bolt and nut with new ones I had in my parts stash, replaced the bushings and sleeves as well, and put it all back in the car. These are parts that nobody will ever see but me, but they are like new and should last the life of the car. It's my hope that this will help keep the linkages nice and tight.
There was one pivot bolt that I didn't replace, and that is the one on the bottom of the gearchange assembly. I didn't want to take this all apart when the current bolt and bushings seemed to still be working fine. The gearchange assembly was super dirty on the top though, so I tried to clean it up a bit before putting some of the interior back together.
The pivot bolt and extra bushings will go back in my parts stash and will be replaced should I ever have a need to remove this assembly in the future.
Under the center console on my Delorean, there's a plastic panel and I had no idea why it was there, or if it was supposed to be there.
My first thought was that a previous owner needed access to something under the fiberglass underbody and this plastic panel covered up a cutout. My curiosity got the best of me and I pried it off to reveal this:
Under all that dirt and dust is the metal fuel line. This access panel is right above the fuel accumulator and provides access to these junctions, if needed. I learned that this was done at the factory and that many DeLoreans have this. It was nice to learn all of this, but then I had to get the panel back in place.
First, I cleaned up the area as best as I could given the limited access and cleaned up the foam material that was adhered around the edges.
The plastic panel had foam that I had to remove, and I did so with the assistance of a razor.
I cut out a new piece of foam that I had leftover from when I restored the A/C unit assembly and it was the perfect thickness. I used some gasket maker to adhere everything together and put the panel back into the car. All that effort just to answer the question of what was behind the cover!