Wednesday, May 25, 2022

More DeLorean cosmetic fixes

My car is not cosmetically perfect, but I'll be darned if it isn't getting closer with ever small fix I make. I make lists of things that I find that could/should be replaced at some point in the future, then work on them as time allows after the parts are delivered by my vendor of choice that week.

While working on the car recently, I found a few more places that had quite a bit of corrosion on nuts and bolts and other things and decided to replace them. First, the nut cap on the windshield wiper was faded to a gray color, which you only see when the front trunk is open.


The new cap is a small detail, but it looks much, much better. The old one pulled right out when I gripped it with some pliers, and the new one popped right back in its place.

Next, for an even smaller detail, I noticed the screws holding the cowl screen on beneath the windshield had some corrosion as well, which made them also appear gray instead of black.

After taking them out, I found that they were even more corroded in the threads. The new one is shown on the left in the pic below. The new ones threaded right in without any problems.


When I put my car back together recently after pulling the motor, I discovered a lot of corrosion on all of the screws holding the rear fascia along the top side. I replaced all of those with new screws and they look much better now:


Fixed DeLorean engine compartment light

There are a few things that have never worked on my DeLorean since I bought it in 2011. One was the interior dome lights that wouldn't come on when the doors opened, which I recently fixed, and another was no functioning engine compartment light. My car hasn't even had a bulb in the light housing since I bought the car. 

I bought a correct light, installed it in the housing, but it wouldn't turn on. I then noticed that the switch had separated, so I took it all the way apart, cleaned the contacts on the inside, then glued it back together to keep it from separating again. I was then pleasantly surprised that the light came on for the first time ever, but it only works if the switch is wiggled just right, indicating that the switch will need to be replaced. It was a pretty easy diagnosis and repair, but never one that was high on my priority list.


Friday, April 1, 2022

Restored DeLorean rear quarter louvre

While I was in the process of painting the rear louvre that goes over the engine, I decided to also try and restore the look of the louvres located in the rear quarter panel on each side of the DeLorean. Mine were faded from black to gray and I felt this small improvement would help the look of the car.

Before doing anything, I taped off the louvre so as to protect the stainless rear quarter. This job can easily be done with the rear quarter panels still on the car. If you are going to be taking off the rear quarters for another reason, you could remove the rear quarter louvres then, but I wouldn't recommend removing the rear quarter panel just for this job. Here is the start of my tape job before I did anything to restore the louvre. Notice how gray it looks:


 After taping everything off, I took the same approach as the rear sunshade/louvre, which was to sand them down with 400 grit to get exfoliate the top layer of faded plastic. I then wiped them down with acetone to get them nice and clean.

I then applied several coats of SEM 39143 Trim Black over the next couple of days. I took my time and applied fairly thin coats, even though this pain is extremely forgiving:


Here is the final look. I am very happy with how much better it looks. I used this same paint in the rear pontoon several years ago and have been very pleased with how well it has held up all these years. I suspect that this will look nice for many years to come.


Restored DeLorean rear louvre w/ reinforcement bracket

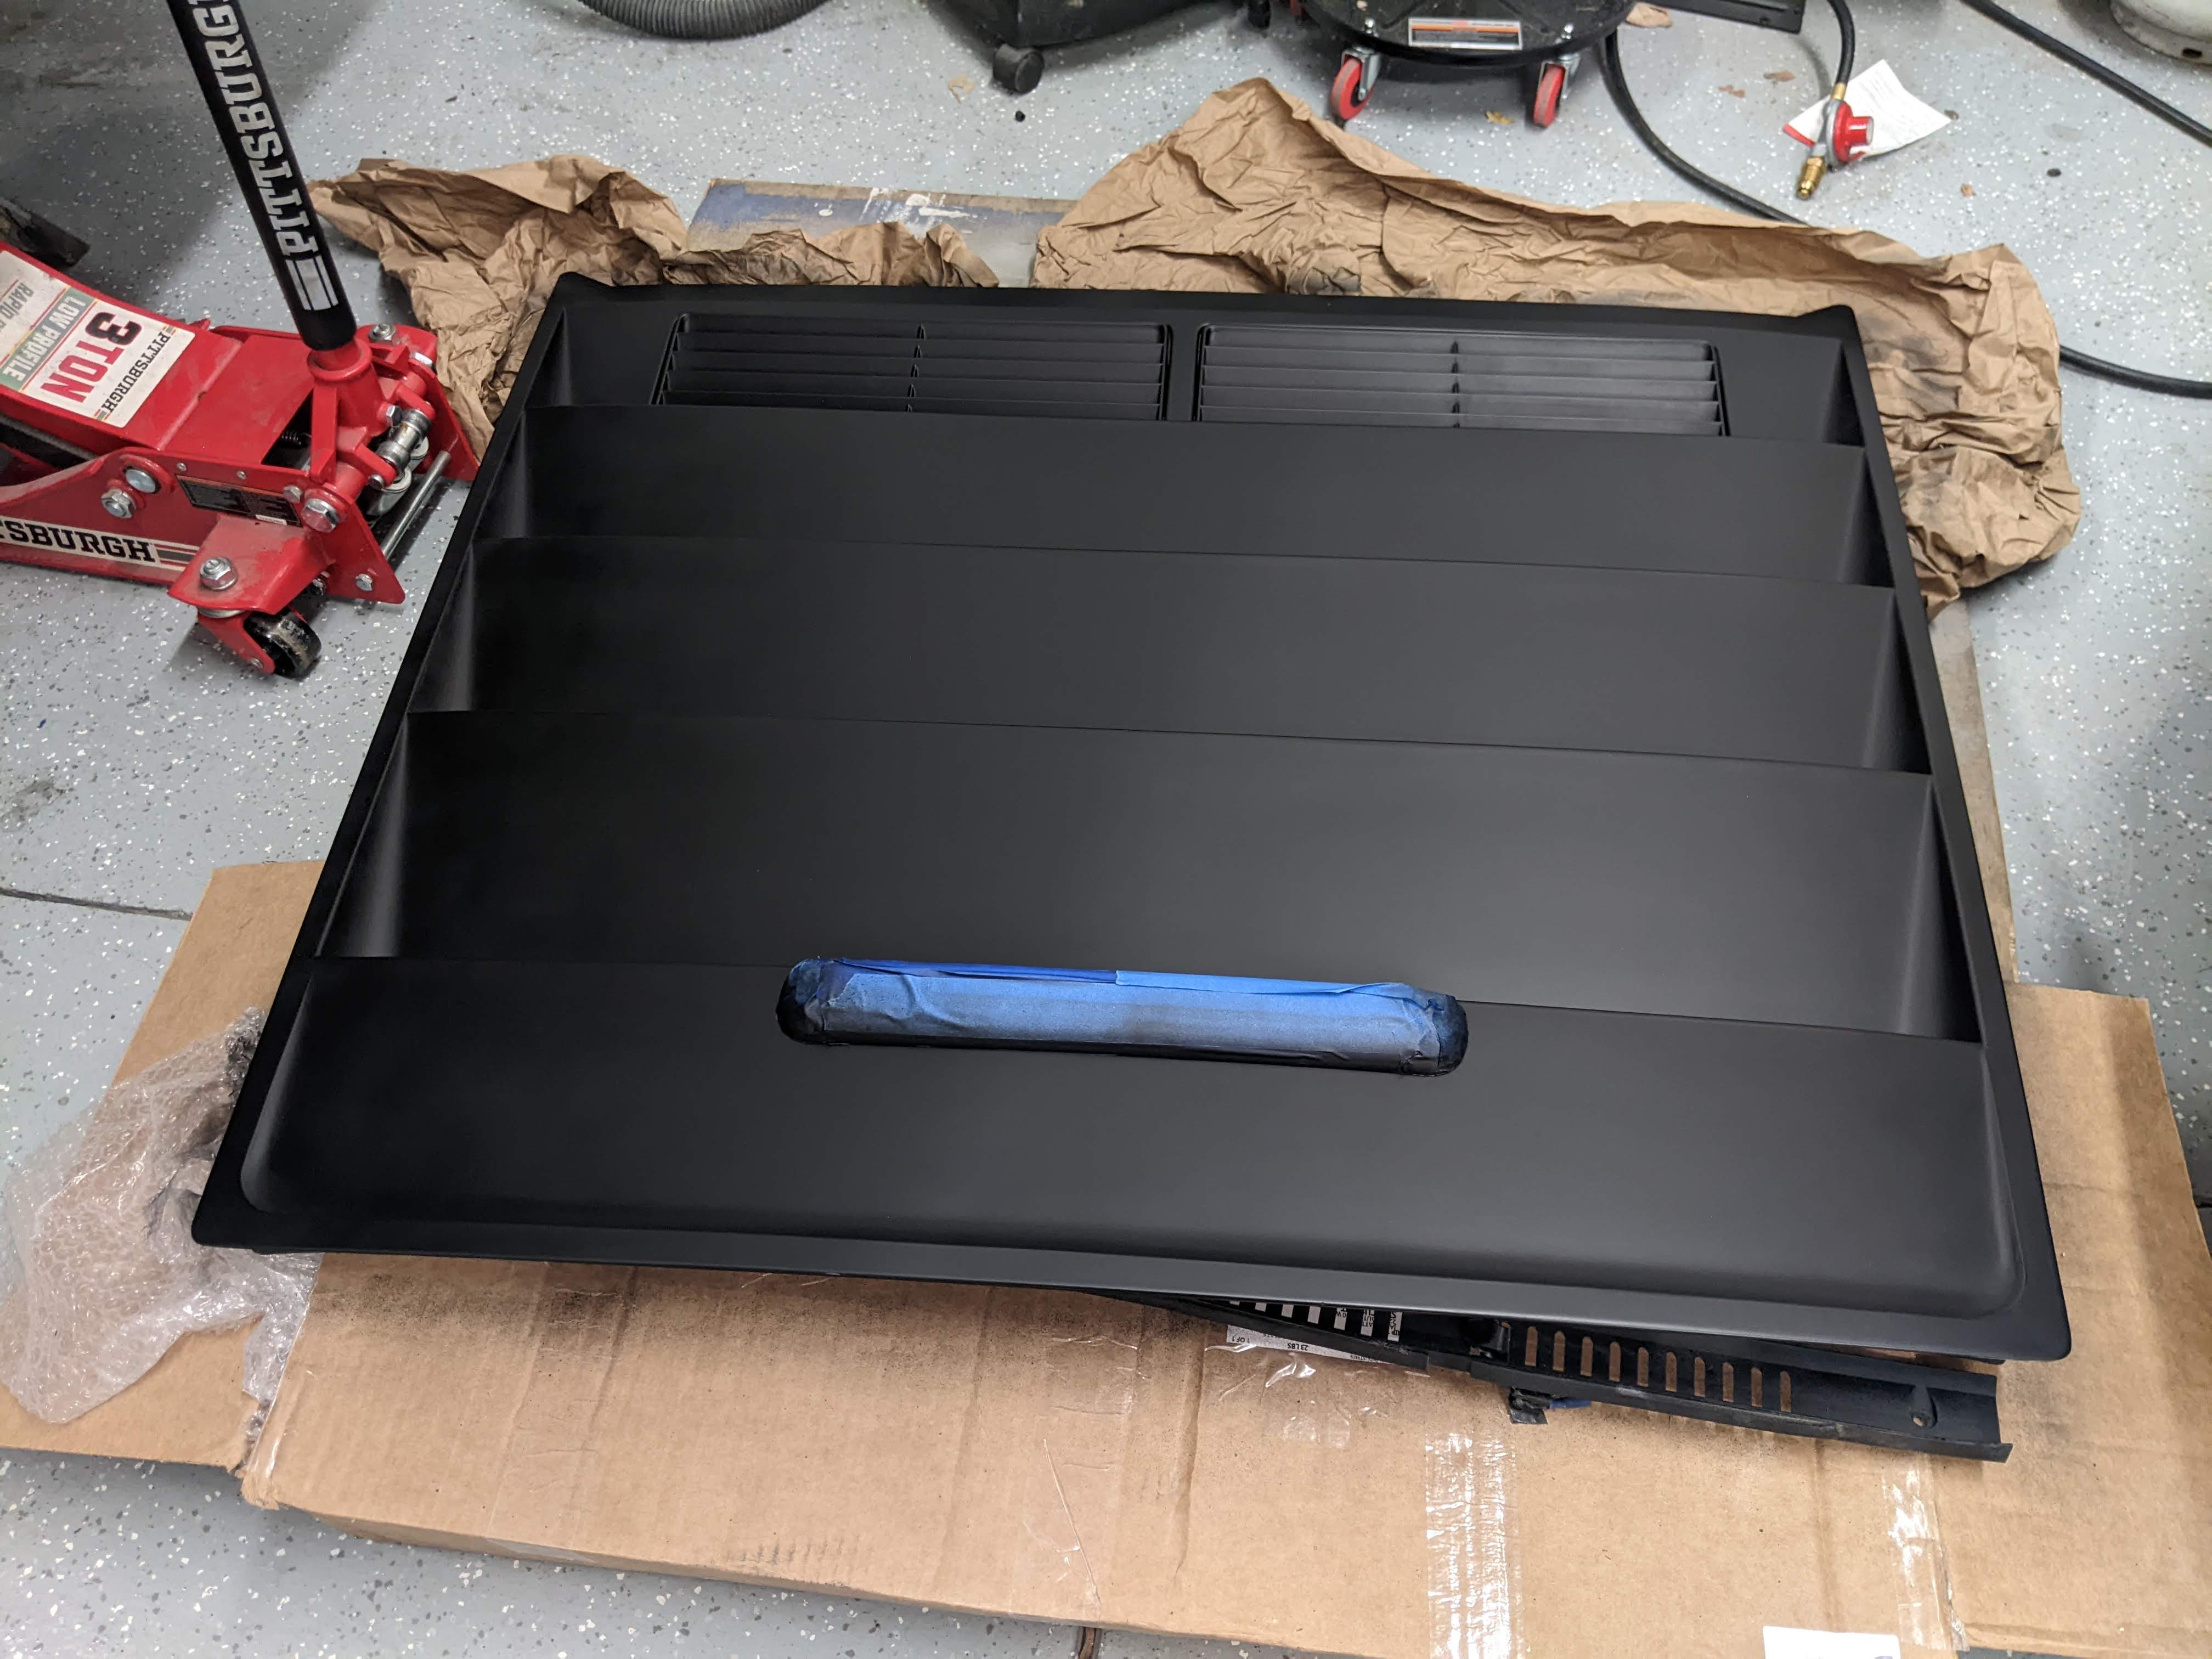
 I had removed the rear louvre when I needed to pull the engine to fix a broken engine mount bolt and I knew that I was going to refresh it and make it look brand new before putting it back on the car. The rear louvre is made of fiberglass and appears to be simply painted black, so I approached this repair that same way that I did of the pontoon tub back when I refreshed the engine bay several years ago.

I started by sanding down the louvres using 400 grit sandpaper to smooth out any imperfections and to give the pain a little more bite when it came time to paint it. I then wiped down the entire thing with acetone to make it nice and clean:


The previous owner of my DeLorean had installed a 3rd brake light that attaches to the top of the louvre and when I went to remove it, I found that it was stuck, most likely from an adhesive or gasket, so I decided to leave it on and I just taped it off for the paint job.

I then used SEM 39143 Trim Black spray paint, which does an absolute amazing job of lying flat and it looks perfect after several coats. I took my time and did very light coats over several days on every side and in all the crevices. Here it is in the process of getting painted:


After paint, I finally installed the louvre reinforcement bracket that I've had for nearly a year and a half, but hadn't gotten around to installing it yet due to other priorities on the car. It came with no instructions, so I simply test fitted it, then marked the holes by scratching the outline with a small nail. 

I first tried to use a drill with a small bit, thinking I would eventually step up to a larger bit, but found it was too difficult to get the pilot hole exactly centered. I then remembered how I used a dremel to drill out several snapped bolts on the car and found that worked much better to drill out the holes that the old DeWalt drill. I even used the louvre brace to finalize the size of the holes with the dremel, the brace acting as a stencil, if you will. 

Here's the test fit of the brace before drilling any holes:

Here is the brace fully installed and the louvre back on the car. The white stuff is dust from drilling the holes in the fiberglass louvre that I haven't wiped down yet. The car needs a good cleaning after I get everything back together anyway.


Here is one of my favorite features of the louvre brace: the ability to hold up the engine cover so that I no longer need to use the engine cover stay assembly. I have since removed it from my car as it's no longer needed.


Saturday, March 12, 2022

Restored DeLorean seat belt hardware

As I work my way down the list of cosmetic fixes, I got to work on some minor things in the interior of the DeLorean. One small thing that surprised me when I got my car was how much corrosion there was on the seat belt bolts and the metal brackets on the bottom of the interior of the car. I decided to replace the old bolts with new ones, but to keep the original hardware, but refresh it by sandblasting and painting it to look new again. 

Here are the old bolts after taking them out, as well as what the old washers and other hardware looked like. The passenger side hardware (2nd picture below) was in much worse condition than the driver side (3rd picture below):


I sandblasted all of the washers and other hardware and even the metal brackets that are attached to the ends of the seat belts as they had the black paint or powdercoating material worn off in several places and had rust showing. I painted those with black POR15, trying my best to not get that on the actual seat belt itself, as well as a large washer that was originally black. I also painted the other washers and hardware in either silver or gold, depending on their original color. 

 It's such a small thing, but they look so much better and I'm very pleased with the result. It's not a bad time in DeLorean ownership when you can start worrying about small things like this.


Installed DeLorean radiator bleed kit

 With the complete removal and installation of the engine, nearly all of the coolant had been drained from the system and I didn't want any funny business with getting it put back together. My car already had the automatic bleeder kit installed and it had worked great for the last decade or so, but I had never had the radiator bone dry. For peace of mind, I bought a radiator bleed kit from DMCMW and installed it in less than 10 minutes.

It hooks into the small upper line coming off the radiator on the passenger side of the motor. You just cut out an inch or two of the line, install the T-fitting, tighten the clamps, and you're good to go. 

Here's what the line looks like before the install:

Here it is after the install. It comes with the clear tube so you can see when bubbles stop coming out when you are bleeding it:


You can remove the clear tube, if you'd like. After I filled the system up with coolant, I opened the t-fitting and quite a bit of air came out. I later opened it again after running the car for a while and was surprised at how many more bubbles came out, even with the automatic bleeder in the engine bay. That proves to me that this wasn't a terrible idea to put on my car after all. So far, the cooling system is working well, getting up to temperature, and the system is pressurizing, so I'm very pleased.

Wednesday, March 9, 2022

Fixed DeLorean interior dome lights

Ever since I bought my car back in 2011, the interior dome lights never turned on when the doors open. I could get them to turn on manually when flipping them on, shown in this explanation video I did back in 2013:


I even replaced the original dome lights with some nice new ones back in 2016 because the originals were being held in place with double sided foam tape and looked tacky. I documented that in this post.
 
I had done all of the obvious checks, such as the door plunger wiring, the wiring on the dome lights, but missed one of the most simple things to replace: the diodes. 
 
The diodes for these lights are located on the driver side of the center console, not too far from the gas pedal. Mine were red, blue, and black, shown here:


I had three new diodes from DMCH that I had sitting on my shelf that I never got around to installing until this week. I am pleased to report that my interior dome lights now work perfectly. They come on when a door is open and turn off when the door closes. I can't believe that it took me 11 years of ownership to finally repair something so simple!